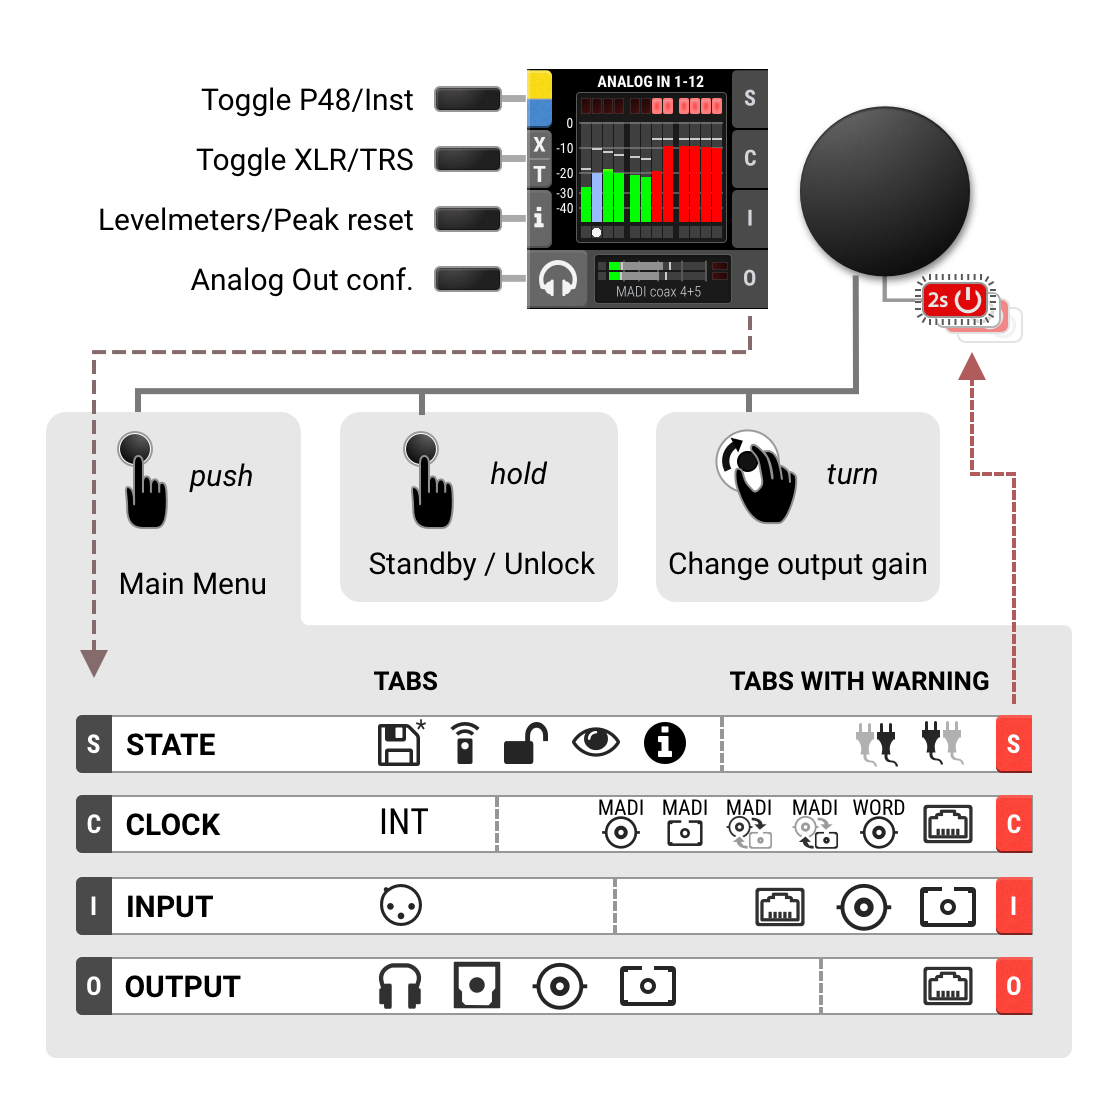
Controlling the device
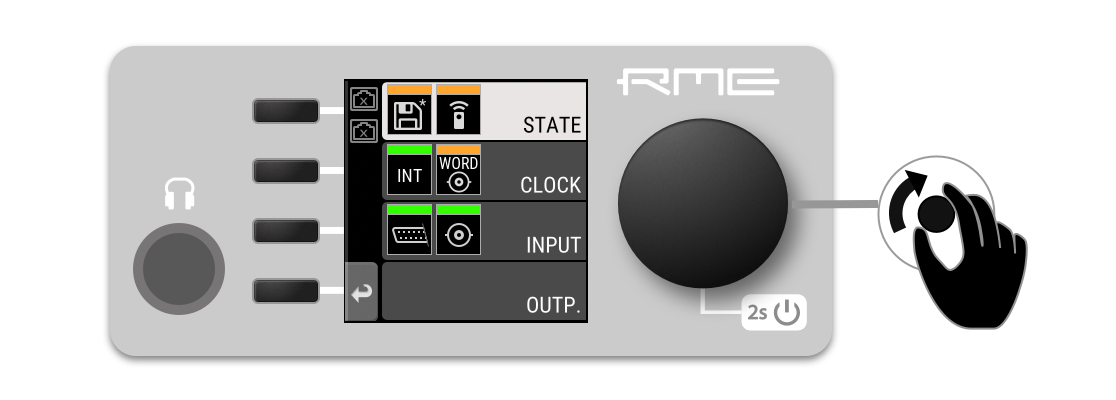
The 12Mic can be controlled directly at the unit. For this purpose, a display, buttons, and an encoder provide access to all features. From the main screen, the encoder knob is used to access the main menu. It also controls the gain of the headphone output if turned, and puts the device into standby mode if pushed for several seconds.
Sections
The main menu separates all controls into one of four sections:
-
STATE for general settings
-
CLOCK for digital clock related settings
-
INPUT for audio input related settings
-
OUTPUT for audio output related settings and routing
-
Push the encoder to open the menu
-
Rotate the encoder to highlight the "INPUT" section
-
Push the encoder to open the "INPUT" section.
Tabs
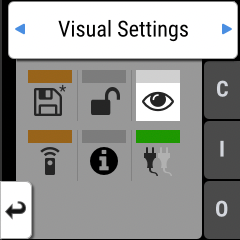
The STATE, INPUT and OUTPUT sections are further divided into tabs, which are shown when the section is opened. Upon opening one of these sections, a cursor is shown to navigate between tabs and settings. To leave a tab or the section, use the return button: |
|

Tabs can generate a warning whenever a configured signal path cannot be established. This is then indicated on the main screen as a red highlight of the corresponding section and in the main menu. Warnings occur for example when a clock reference signal does not match the internal sample rate. They also cause the standby LED to flash in white and red.
Tabs in the main menu can also show a 'caution notification' (orange), for example if a modified preset was not saved. To see these notifications, open the main menu by pushing the encoder.