Routing Signals to the Outputs
Each output channel of the 12Mic can receive any input signal. If preset 1 has not been modified, it contains a routing of all analog inputs to all digital outputs. However, this can be adjusted and changed easily. The factory default preset does not contain any routing.
| A routing immediately activates input monitoring for a corresponding digital input and raises a warning in the input state if the source signal is not available or out of sync. |
The following example shows the procedure to route to MADI Coaxial output channels. Other outputs follow the same procedure.
-
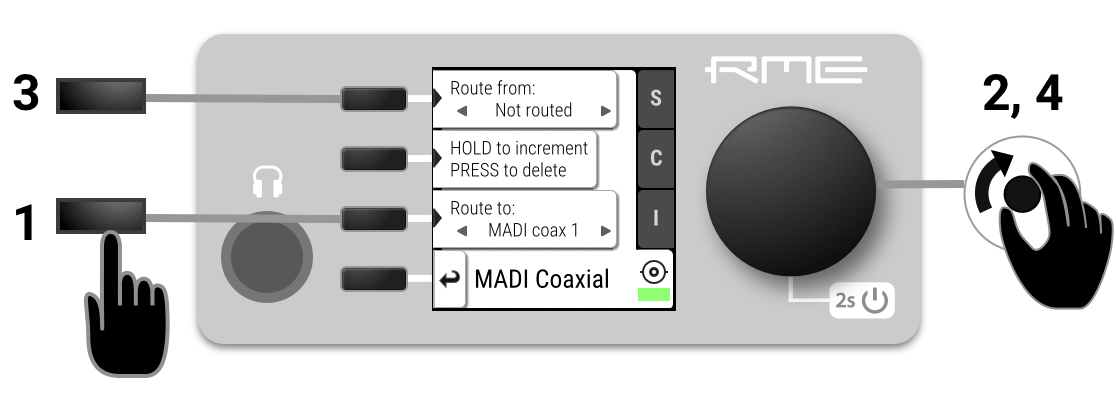
Open the routing tab of the MADI Coaxial output in the OUTPUT section (see Controlling the device).
-
Activate the routing destination and choose an output channel with the encoder (steps 1 and 2).
-
Activate the routing source and choose an input channel with the encoder (steps 3 and 4).
-
Navigate to the corresponding output channel (1, 2).
-
Double click on "Increment routing". The routing source will be changed to "not routed".
-
(optional) Hold "increment routing" while turning the encoder to remove routings to the following output channels.
-
Navigate to the first output channel (1, 2) and create a routing as described above.
-
Hold "increment routing" while turning the encoder clockwise to increment input channel and output channel at the same time.
-
Enter the Routing mode by pressing the corresponding icon in the title bar.
-
Click the MADI coaxial or MADI optical output port.
-
Select individual or consecutive channels by clicking or dragging. The channels are highlighted in blue and an arrow handler is revealed.
-
If the input ports are closed, drag the handle onto an input port, it opens automatically.
-
Drag the handle onto the source channel strips to select a range of channels as signal source.